Compare

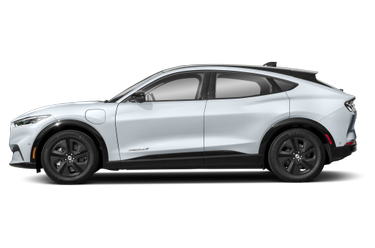
$74,800
$35,200

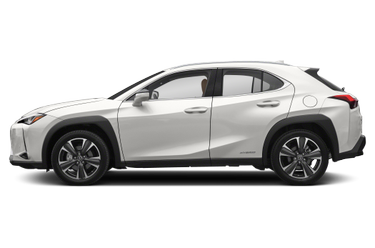
$39,990
Hide similarities

Highlights
|
$74,800
Starting MSRP
|
$42,895
Starting MSRP
|
$35,200
Starting MSRP
|
$39,990
Starting MSRP
|
|
N/A
Towing Capacity
|
N/A
Towing Capacity
|
N/A
Towing Capacity
|
3,500 lbs
Towing Capacity
|
|
N/A
Cargo Capacity
|
N/A
Cargo Capacity
|
N/A
Cargo Capacity
|
N/A
Cargo Capacity
|
|
Electric
Engine Type
|
Electric
Engine Type
|
Gas/Electric I-4
Engine Type
|
Electric
Engine Type
|
|
74
/ 73 MPGe
|
-
MPGe
|
41
/ 38 MPGe
|
140
/ 119 MPGe
|
|
-
Combined MPGe
|
93 - 100
Combined MPGe
|
-
Combined MPGe
|
-
Combined MPGe
|
|
204 mi.
Range
|
211 - 230 mi.
Range
|
-
Range
|
244 - 303 mi.
Range
|
|
10 hrs.
Level 2 Charging
|
8 hrs.
Level 2 Charging
|
-
Level 2 Charging
|
10 hrs.
Level 2 Charging
|
|
30 mins.
DC Fast charging
|
-
DC Fast charging
|
-
DC Fast charging
|
30 mins.
DC Fast charging
|
|
86 - 95 kWh
Battery Capacity
|
68 - 70 kWh
Battery Capacity
|
-
Battery Capacity
|
75 kWh
Battery Capacity
|
|
355 hp
Horsepower
|
266 hp
Horsepower
|
181 hp
Horsepower
|
271 hp
Horsepower
|
|
All Wheel Drive
Drive Type
|
Rear Wheel Drive
Drive Type
|
All Wheel Drive
Drive Type
|
Rear Wheel Drive
Drive Type
|
|
5
Seating Capacity
|
5
Seating Capacity
|
5
Seating Capacity
|
7
Seating Capacity
|
|
4 yr / 50,000 mi
Basic Warranty
|
3 yr / 36,000 mi
Basic Warranty
|
4 yr / 50,000 mi
Basic Warranty
|
4 yr / 50,000 mi
Basic Warranty
|
Engine
|
N/A
Displacement
|
N/A
Displacement
|
2.0 L/121
Displacement
|
N/A
Displacement
|
|
355
SAE Net Horsepower @ RPM
|
266
SAE Net Horsepower @ RPM
|
181 @ 6000
SAE Net Horsepower @ RPM
|
271
SAE Net Horsepower @ RPM
|
|
Electric
Engine Type
|
Electric
Engine Type
|
Gas/Electric I-4
Engine Type
|
Electric
Engine Type
|
|
414
SAE Net Torque @ RPM
|
317
SAE Net Torque @ RPM
|
N/A
SAE Net Torque @ RPM
|
310
SAE Net Torque @ RPM
|
|
1-Speed A/T
A/T Transmission Options
|
1-Speed A/T
A/T Transmission Options
|
CVT Transmission
A/T Transmission w/Dual Shift Mode Transmission Options
|
1-Speed A/T
A/T Transmission Options
|
|
-
MPG
|
-
MPG
|
41 City / 38 Hwy
MPG
|
-
MPG
|
|
N/A
Total Cooling System Capacity
|
N/A
Total Cooling System Capacity
|
N/A
Total Cooling System Capacity
|
N/A
Total Cooling System Capacity
|
Tires & Wheels
|
P255/50HR20
Rear Tire Size
|
P225/60WR18
Rear Tire Size
|
P225/50HR18
Rear Tire Size
|
P255/45WR19
Rear Tire Size
|
|
Compact
Spare Tire Size
|
N/A
Spare Tire Size
|
N/A
Spare Tire Size
|
N/A
Spare Tire Size
|
|
P255/50HR20
Front Tire Size
|
P225/60WR18
Front Tire Size
|
P225/50HR18
Front Tire Size
|
P255/45WR19
Front Tire Size
|
|
Aluminum
Front Wheel Material
|
Aluminum
Front Wheel Material
|
Aluminum
Front Wheel Material
|
Aluminum
Front Wheel Material
|
|
Steel
Spare Wheel Material
|
N/A
Spare Wheel Material
|
N/A
Spare Wheel Material
|
N/A
Spare Wheel Material
|
|
20 X 9 in
Front Wheel Size
|
18 X 8 in
Front Wheel Size
|
18 X 7 in
Front Wheel Size
|
19 X 9.5 in
Front Wheel Size
|
|
Aluminum
Rear Wheel Material
|
Aluminum
Rear Wheel Material
|
Aluminum
Rear Wheel Material
|
Aluminum
Rear Wheel Material
|
|
Compact in
Spare Wheel Size
|
N/A
Spare Wheel Size
|
N/A
Spare Wheel Size
|
N/A
Spare Wheel Size
|
|
20 X 9 in
Rear Wheel Size
|
18 X 8 in
Rear Wheel Size
|
18 X 7 in
Rear Wheel Size
|
19 X 9.5 in
Rear Wheel Size
|
Suspension
|
Multi-Link
Suspension Type - Rear
|
Multi-Link
Suspension Type - Rear
|
Multi-Link
Suspension Type - Rear
|
Multi-Link
Suspension Type - Rear
|
|
Multi-Link
Suspension Type - Front (Cont.)
|
Strut
Suspension Type - Front (Cont.)
|
Strut
Suspension Type - Front (Cont.)
|
Double Wishbone
Suspension Type - Front (Cont.)
|
|
Multi-Link
Suspension Type - Front
|
Strut
Suspension Type - Front
|
Strut
Suspension Type - Front
|
Double Wishbone
Suspension Type - Front
|
|
Multi-Link
Suspension Type - Rear (Cont.)
|
Multi-Link
Suspension Type - Rear (Cont.)
|
Multi-Link
Suspension Type - Rear (Cont.)
|
Multi-Link
Suspension Type - Rear (Cont.)
|
Steering
|
N/A
Turning Diameter - Wall to Wall
|
N/A
Turning Diameter - Wall to Wall
|
N/A
Turning Diameter - Wall to Wall
|
N/A
Turning Diameter - Wall to Wall
|
|
Rack-Pinion
Steering Type
|
Rack-Pinion
Steering Type
|
Rack-Pinion
Steering Type
|
Rack-Pinion
Steering Type
|
|
40 ft
Turning Diameter - Curb to Curb
|
38 ft
Turning Diameter - Curb to Curb
|
34 ft
Turning Diameter - Curb to Curb
|
40 ft
Turning Diameter - Curb to Curb
|
|
N/A
Lock to Lock Turns (Steering)
|
N/A
Lock to Lock Turns (Steering)
|
N/A
Lock to Lock Turns (Steering)
|
N/A
Lock to Lock Turns (Steering)
|
|
N/A
Steering Ratio (:1), Overall
|
N/A
Steering Ratio (:1), Overall
|
N/A
Steering Ratio (:1), Overall
|
N/A
Steering Ratio (:1), Overall
|
Measurements
|
39 in
Second Head Room
|
38 in
Second Head Room
|
36 in
Second Head Room
|
39 in
Second Head Room
|
|
76 in
Width, Max w/o mirrors
|
74 in
Width, Max w/o mirrors
|
72 in
Width, Max w/o mirrors
|
76 in
Width, Max w/o mirrors
|
|
N/A
Liftover Height
|
N/A
Liftover Height
|
N/A
Liftover Height
|
N/A
Liftover Height
|
|
193 in
Length, Overall
|
186 in
Length, Overall
|
177 in
Length, Overall
|
187 in
Length, Overall
|
|
41 in
Front Leg Room
|
43 in
Front Leg Room
|
42 in
Front Leg Room
|
42 in
Front Leg Room
|
|
N/A
Rear Door Opening Height
|
N/A
Rear Door Opening Height
|
N/A
Rear Door Opening Height
|
N/A
Rear Door Opening Height
|
|
115 in
Wheelbase
|
118 in
Wheelbase
|
104 in
Wheelbase
|
114 in
Wheelbase
|
|
N/A
Cargo Volume to Seat 3
|
N/A
Cargo Volume to Seat 3
|
N/A
Cargo Volume to Seat 3
|
N/A
Cargo Volume to Seat 3
|
|
-
Third Shoulder Room
|
-
Third Shoulder Room
|
-
Third Shoulder Room
|
N/A
Third Shoulder Room
|
|
N/A
Cargo Area Length @ Floor to Seat 2
|
37 in
Cargo Area Length @ Floor to Seat 2
|
N/A
Cargo Area Length @ Floor to Seat 2
|
N/A
Cargo Area Length @ Floor to Seat 2
|
|
-
Third Hip Room
|
-
Third Hip Room
|
-
Third Hip Room
|
N/A
Third Hip Room
|
|
-
Third Head Room
|
-
Third Head Room
|
-
Third Head Room
|
N/A
Third Head Room
|
|
N/A
Rear Door Opening Width
|
N/A
Rear Door Opening Width
|
N/A
Rear Door Opening Width
|
N/A
Rear Door Opening Width
|
|
N/A
Passenger Volume
|
101 ft³
Passenger Volume
|
90 ft³
Passenger Volume
|
N/A
Passenger Volume
|
|
57 in
Second Shoulder Room
|
56 in
Second Shoulder Room
|
53 in
Second Shoulder Room
|
54 in
Second Shoulder Room
|
|
57 ft³
Cargo Volume to Seat 1
|
60 ft³
Cargo Volume to Seat 1
|
N/A
Cargo Volume to Seat 1
|
72 ft³
Cargo Volume to Seat 1
|
|
40 in
Front Head Room
|
39 in
Front Head Room
|
37 in
Front Head Room
|
41 in
Front Head Room
|
|
5
Passenger Capacity
|
5
Passenger Capacity
|
5
Passenger Capacity
|
5
Passenger Capacity
|
|
N/A
Min Ground Clearance
|
6 in
Min Ground Clearance
|
N/A
Min Ground Clearance
|
7 in
Min Ground Clearance
|
|
29 ft³
Cargo Volume to Seat 2
|
30 ft³
Cargo Volume to Seat 2
|
22 ft³
Cargo Volume to Seat 2
|
30 ft³
Cargo Volume to Seat 2
|
|
66 in
Height, Overall
|
64 in
Height, Overall
|
61 in
Height, Overall
|
64 in
Height, Overall
|
|
N/A
Cargo Box Width @ Wheelhousings
|
N/A
Cargo Box Width @ Wheelhousings
|
N/A
Cargo Box Width @ Wheelhousings
|
N/A
Cargo Box Width @ Wheelhousings
|
|
-
Third Leg Room
|
-
Third Leg Room
|
-
Third Leg Room
|
N/A
Third Leg Room
|
|
N/A
Cargo Area Length @ Floor to Seat 3
|
N/A
Cargo Area Length @ Floor to Seat 3
|
N/A
Cargo Area Length @ Floor to Seat 3
|
N/A
Cargo Area Length @ Floor to Seat 3
|
|
N/A
Cargo Area Width @ Beltline
|
59 in
Cargo Area Width @ Beltline
|
N/A
Cargo Area Width @ Beltline
|
N/A
Cargo Area Width @ Beltline
|
|
N/A
Cargo Box (Area) Height
|
34 in
Cargo Box (Area) Height
|
N/A
Cargo Box (Area) Height
|
N/A
Cargo Box (Area) Height
|
|
59 in
Front Shoulder Room
|
58 in
Front Shoulder Room
|
55 in
Front Shoulder Room
|
56 in
Front Shoulder Room
|
|
39 in
Second Leg Room
|
38 in
Second Leg Room
|
33 in
Second Leg Room
|
41 in
Second Leg Room
|
|
N/A
Second Hip Room
|
53 in
Second Hip Room
|
52 in
Second Hip Room
|
51 in
Second Hip Room
|
|
65 in
Track Width, Front
|
64 in
Track Width, Front
|
61 in
Track Width, Front
|
64 in
Track Width, Front
|
|
65 in
Track Width, Rear
|
63 in
Track Width, Rear
|
61 in
Track Width, Rear
|
64 in
Track Width, Rear
|
|
N/A
Cargo Area Length @ Floor to Seat 1
|
70 in
Cargo Area Length @ Floor to Seat 1
|
N/A
Cargo Area Length @ Floor to Seat 1
|
N/A
Cargo Area Length @ Floor to Seat 1
|
|
N/A
Front Hip Room
|
55 in
Front Hip Room
|
54 in
Front Hip Room
|
54 in
Front Hip Room
|
Weight & Capacity
|
N/A
Maximum Trailering Capacity
|
N/A
Maximum Trailering Capacity
|
N/A
Maximum Trailering Capacity
|
3,500 lbs
Maximum Trailering Capacity
|
|
N/A
Curb Weight - Rear
|
N/A
Curb Weight - Rear
|
N/A
Curb Weight - Rear
|
N/A
Curb Weight - Rear
|
|
N/A
Aux Fuel Tank Capacity, Approx
|
N/A
Aux Fuel Tank Capacity, Approx
|
N/A
Aux Fuel Tank Capacity, Approx
|
N/A
Aux Fuel Tank Capacity, Approx
|
|
N/A
Maximum Payload Capacity
|
N/A
Maximum Payload Capacity
|
N/A
Maximum Payload Capacity
|
N/A
Maximum Payload Capacity
|
|
N/A
Fuel Tank Capacity, Approx
|
N/A
Fuel Tank Capacity, Approx
|
11 gal
Fuel Tank Capacity, Approx
|
N/A
Fuel Tank Capacity, Approx
|
|
0 lbs
Total Option Weight
|
0 lbs
Total Option Weight
|
0 lbs
Total Option Weight
|
0 lbs
Total Option Weight
|
|
N/A
Wt Distributing Hitch - Max Trailer Wt.
|
N/A
Wt Distributing Hitch - Max Trailer Wt.
|
N/A
Wt Distributing Hitch - Max Trailer Wt.
|
3,500 lbs
Wt Distributing Hitch - Max Trailer Wt.
|
|
N/A
Dead Weight Hitch - Max Trailer Wt.
|
N/A
Dead Weight Hitch - Max Trailer Wt.
|
N/A
Dead Weight Hitch - Max Trailer Wt.
|
3,500 lbs
Dead Weight Hitch - Max Trailer Wt.
|
|
N/A
Wt Distributing Hitch - Max Tongue Wt.
|
N/A
Wt Distributing Hitch - Max Tongue Wt.
|
N/A
Wt Distributing Hitch - Max Tongue Wt.
|
350 lbs
Wt Distributing Hitch - Max Tongue Wt.
|
|
N/A
Curb Weight - Front
|
N/A
Curb Weight - Front
|
N/A
Curb Weight - Front
|
N/A
Curb Weight - Front
|
|
N/A
Curb Weight
|
N/A
Curb Weight
|
N/A
Curb Weight
|
N/A
Curb Weight
|
|
5,754 lbs
Base Curb Weight
|
4,394 lbs
Base Curb Weight
|
3,605 lbs
Base Curb Weight
|
4,065 lbs
Base Curb Weight
|
|
N/A
Dead Weight Hitch - Max Tongue Wt.
|
N/A
Dead Weight Hitch - Max Tongue Wt.
|
N/A
Dead Weight Hitch - Max Tongue Wt.
|
350 lbs
Dead Weight Hitch - Max Tongue Wt.
|
Safety
|
Standard
Lane Departure Warning
|
Standard
Lane Departure Warning
|
Standard
Lane Departure Warning
|
Standard
Lane Departure Warning
|
|
Standard
Stability Control
|
Standard
Stability Control
|
Standard
Stability Control
|
Standard
Stability Control
|
|
Standard
Blind Spot Monitor
|
Standard
Blind Spot Monitor
|
Standard
Blind Spot Monitor
|
Standard
Blind Spot Monitor
|
|
Standard
Backup Camera
|
Standard
Backup Camera
|
Standard
Backup Camera
|
Standard
Backup Camera
|
|
-
Rear Cross Traffic Alert
|
-
Rear Cross Traffic Alert
|
Standard
Rear Cross Traffic Alert
|
-
Rear Cross Traffic Alert
|
|
Standard
Automatic Emergency Braking
|
-
Automatic Emergency Braking
|
-
Automatic Emergency Braking
|
-
Automatic Emergency Braking
|
Entertainment
|
-
Bluetooth®
|
-
Bluetooth®
|
Standard
Bluetooth®
|
Standard
Bluetooth®
|
Electrical
|
380
Cold Cranking Amps @ 0° F (Primary)
|
N/A
Cold Cranking Amps @ 0° F (Primary)
|
N/A
Cold Cranking Amps @ 0° F (Primary)
|
N/A
Cold Cranking Amps @ 0° F (Primary)
|
|
N/A
Maximum Alternator Capacity (amps)
|
N/A
Maximum Alternator Capacity (amps)
|
N/A
Maximum Alternator Capacity (amps)
|
N/A
Maximum Alternator Capacity (amps)
|
Brakes
|
Yes
Disc - Rear (Yes or )
|
Yes
Disc - Rear (Yes or )
|
Yes
Disc - Rear (Yes or )
|
Yes
Disc - Rear (Yes or )
|
|
4-Wheel
Brake ABS System
|
4-Wheel
Brake ABS System
|
4-Wheel
Brake ABS System
|
4-Wheel
Brake ABS System
|
|
Yes
Disc - Front (Yes or )
|
Yes
Disc - Front (Yes or )
|
Yes
Disc - Front (Yes or )
|
Yes
Disc - Front (Yes or )
|
|
N/A
Brake ABS System (Second Line)
|
N/A
Brake ABS System (Second Line)
|
N/A
Brake ABS System (Second Line)
|
N/A
Brake ABS System (Second Line)
|
|
4-Wheel Disc
Brake Type
|
4-Wheel Disc
Brake Type
|
4-Wheel Disc
Brake Type
|
4-Wheel Disc
Brake Type
|
|
N/A
Drum - Rear (Yes or )
|
N/A
Drum - Rear (Yes or )
|
N/A
Drum - Rear (Yes or )
|
N/A
Drum - Rear (Yes or )
|
|
14 in
Rear Brake Rotor Diam x Thickness
|
12 in
Rear Brake Rotor Diam x Thickness
|
11 in
Rear Brake Rotor Diam x Thickness
|
13 in
Rear Brake Rotor Diam x Thickness
|
|
16 in
Front Brake Rotor Diam x Thickness
|
14 in
Front Brake Rotor Diam x Thickness
|
12 in
Front Brake Rotor Diam x Thickness
|
14 in
Front Brake Rotor Diam x Thickness
|