


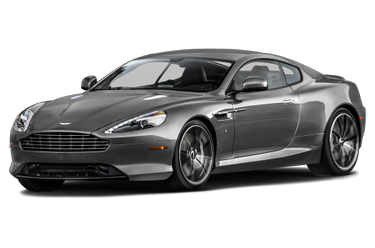
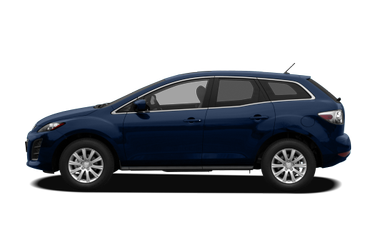
Aston Martin DB9 vs. Mazda CX-7
Hide similarities

Highlights
|
$198,250
Starting MSRP
|
$22,190
Starting MSRP
|
-
Starting MSRP
|
|
|
-
Towing Capacity
|
N/A
Towing Capacity
|
-
Towing Capacity
|
|
|
-
Cargo Capacity
|
N/A
Cargo Capacity
|
-
Cargo Capacity
|
|
|
Premium Unleaded V-12
Engine Type
|
Gas I4
Engine Type
|
-
Engine Type
|
|
|
13 City / 19 Hwy
MPG
|
20 City / 27 Hwy
MPG
|
-
MPG
|
|
|
540 hp
Horsepower
|
161 hp
Horsepower
|
-
Horsepower
|
|
|
Rear Wheel Drive
Drive Type
|
Front Wheel Drive
Drive Type
|
-
Drive Type
|
|
|
2
Seating Capacity
|
5
Seating Capacity
|
-
Seating Capacity
|
|
|
3 yr / -1 mi
Basic Warranty
|
3 yr / 36,000 mi
Basic Warranty
|
-
Basic Warranty
|
Engine
|
457 @ 5500
SAE Net Torque @ RPM
|
161 @ 3500
SAE Net Torque @ RPM
|
-
SAE Net Torque @ RPM
|
|
|
540 @ 6750
SAE Net Horsepower @ RPM
|
161 @ 6000
SAE Net Horsepower @ RPM
|
-
SAE Net Horsepower @ RPM
|
|
|
6.0 L/362
Displacement
|
2.5L/151
Displacement
|
-
Displacement
|
|
|
Premium Unleaded V-12
Engine Type
|
Gas I4
Engine Type
|
-
Engine Type
|
|
|
6-Speed A/T
A/T Transmission w/Dual Shift Mode Transmission Options
|
A/T
5-Speed A/T Transmission Options
|
-
Transmission Options
|
|
|
13 City / 19 Hwy
MPG
|
20 City / 27 Hwy
MPG
|
-
MPG
|
|
|
N/A
Total Cooling System Capacity
|
9.5 qts
Total Cooling System Capacity
|
-
Total Cooling System Capacity
|
Tires & Wheels
|
Aluminum
Spare Wheel Material
|
N/A
Spare Wheel Material
|
-
Spare Wheel Material
|
|
|
Aluminum
Rear Wheel Material
|
Aluminum
Rear Wheel Material
|
-
Rear Wheel Material
|
|
|
Aluminum
Front Wheel Material
|
Aluminum
Front Wheel Material
|
-
Front Wheel Material
|
|
|
Compact in
Spare Wheel Size
|
18 x -TBD- in
Spare Wheel Size
|
-
Spare Wheel Size
|
|
|
20 X 11 in
Rear Wheel Size
|
17 x 7.0 in
Rear Wheel Size
|
-
Rear Wheel Size
|
|
|
20 X 8.5 in
Front Wheel Size
|
17 x 7.0 in
Front Wheel Size
|
-
Front Wheel Size
|
|
|
Compact
Spare Tire Size
|
T155/90D18
Spare Tire Size
|
-
Spare Tire Size
|
|
|
P295/30YR20
Rear Tire Size
|
P215/70HR17
Rear Tire Size
|
-
Rear Tire Size
|
|
|
P245/35YR20
Front Tire Size
|
P215/70HR17
Front Tire Size
|
-
Front Tire Size
|
Suspension
|
Double Wishbone
Suspension Type - Rear (Cont.)
|
w/Coil Springs
Suspension Type - Rear (Cont.)
|
-
Suspension Type - Rear (Cont.)
|
|
|
Double Wishbone
Suspension Type - Front (Cont.)
|
w/Coil Springs
Suspension Type - Front (Cont.)
|
-
Suspension Type - Front (Cont.)
|
|
|
Double Wishbone
Suspension Type - Rear
|
Multi-link
Suspension Type - Rear
|
-
Suspension Type - Rear
|
|
|
Double Wishbone
Suspension Type - Front
|
MacPherson Strut
Suspension Type - Front
|
-
Suspension Type - Front
|
Steering
|
N/A
Turning Diameter - Wall to Wall
|
N/A
Turning Diameter - Wall to Wall
|
-
Turning Diameter - Wall to Wall
|
|
|
41 ft
Turning Diameter - Curb to Curb
|
37 ft
Turning Diameter - Curb to Curb
|
-
Turning Diameter - Curb to Curb
|
|
|
N/A
Lock to Lock Turns (Steering)
|
3
Lock to Lock Turns (Steering)
|
-
Lock to Lock Turns (Steering)
|
|
|
N/A
Steering Ratio (:1), Overall
|
16
Steering Ratio (:1), Overall
|
-
Steering Ratio (:1), Overall
|
|
|
Rack-Pinion
Steering Type
|
Pwr Rack & Pinion
Steering Type
|
-
Steering Type
|
Measurements
|
-
Cargo Volume to Seat 3
|
Not Available ft³
Cargo Volume to Seat 3
|
-
Cargo Volume to Seat 3
|
|
|
-
Cargo Volume to Seat 2
|
30 ft³
Cargo Volume to Seat 2
|
-
Cargo Volume to Seat 2
|
|
|
-
Cargo Volume to Seat 1
|
59 ft³
Cargo Volume to Seat 1
|
-
Cargo Volume to Seat 1
|
|
|
N/A
Liftover Height
|
N/A
Liftover Height
|
-
Liftover Height
|
|
|
-
Cargo Box (Area) Height
|
N/A
Cargo Box (Area) Height
|
-
Cargo Box (Area) Height
|
|
|
-
Cargo Box Width @ Wheelhousings
|
N/A
Cargo Box Width @ Wheelhousings
|
-
Cargo Box Width @ Wheelhousings
|
|
|
-
Cargo Area Width @ Beltline
|
N/A
Cargo Area Width @ Beltline
|
-
Cargo Area Width @ Beltline
|
|
|
-
Cargo Area Length @ Floor to Seat 3
|
N/A
Cargo Area Length @ Floor to Seat 3
|
-
Cargo Area Length @ Floor to Seat 3
|
|
|
-
Cargo Area Length @ Floor to Seat 2
|
N/A
Cargo Area Length @ Floor to Seat 2
|
-
Cargo Area Length @ Floor to Seat 2
|
|
|
-
Cargo Area Length @ Floor to Seat 1
|
N/A
Cargo Area Length @ Floor to Seat 1
|
-
Cargo Area Length @ Floor to Seat 1
|
|
|
-
Rear Door Opening Width
|
N/A
Rear Door Opening Width
|
-
Rear Door Opening Width
|
|
|
-
Rear Door Opening Height
|
N/A
Rear Door Opening Height
|
-
Rear Door Opening Height
|
|
|
N/A
Min Ground Clearance
|
8 in
Min Ground Clearance
|
-
Min Ground Clearance
|
|
|
62 in
Track Width, Rear
|
64 in
Track Width, Rear
|
-
Track Width, Rear
|
|
|
62 in
Track Width, Front
|
64 in
Track Width, Front
|
-
Track Width, Front
|
|
|
51 in
Height, Overall
|
65 in
Height, Overall
|
-
Height, Overall
|
|
|
74 in
Width, Max w/o mirrors
|
74 in
Width, Max w/o mirrors
|
-
Width, Max w/o mirrors
|
|
|
186 in
Length, Overall
|
184 in
Length, Overall
|
-
Length, Overall
|
|
|
108 in
Wheelbase
|
108 in
Wheelbase
|
-
Wheelbase
|
|
|
N/A
Second Hip Room
|
53 in
Second Hip Room
|
-
Second Hip Room
|
|
|
N/A
Second Shoulder Room
|
56 in
Second Shoulder Room
|
-
Second Shoulder Room
|
|
|
N/A
Second Leg Room
|
36 in
Second Leg Room
|
-
Second Leg Room
|
|
|
N/A
Second Head Room
|
39 in
Second Head Room
|
-
Second Head Room
|
|
|
N/A
Front Hip Room
|
55 in
Front Hip Room
|
-
Front Hip Room
|
|
|
55 in
Front Shoulder Room
|
58 in
Front Shoulder Room
|
-
Front Shoulder Room
|
|
|
43 in
Front Leg Room
|
42 in
Front Leg Room
|
-
Front Leg Room
|
|
|
36 in
Front Head Room
|
40 in
Front Head Room
|
-
Front Head Room
|
|
|
N/A
Passenger Volume
|
102 ft³
Passenger Volume
|
-
Passenger Volume
|
|
|
4
Passenger Capacity
|
5
Passenger Capacity
|
-
Passenger Capacity
|
|
|
7 ft³
Trunk Volume
|
-
Trunk Volume
|
-
Trunk Volume
|
Weight & Capacity
|
-
Total Option Weight
|
0 lbs
Total Option Weight
|
-
Total Option Weight
|
|
|
-
Curb Weight
|
N/A
Curb Weight
|
-
Curb Weight
|
|
|
N/A
Aux Fuel Tank Capacity, Approx
|
N/A
Aux Fuel Tank Capacity, Approx
|
-
Aux Fuel Tank Capacity, Approx
|
|
|
21 gal
Fuel Tank Capacity, Approx
|
16 gal
Fuel Tank Capacity, Approx
|
-
Fuel Tank Capacity, Approx
|
|
|
-
Maximum Trailering Capacity
|
N/A
Maximum Trailering Capacity
|
-
Maximum Trailering Capacity
|
|
|
N/A
Wt Distributing Hitch - Max Tongue Wt.
|
Not Available lbs
Wt Distributing Hitch - Max Tongue Wt.
|
-
Wt Distributing Hitch - Max Tongue Wt.
|
|
|
N/A
Wt Distributing Hitch - Max Trailer Wt.
|
Not Available lbs
Wt Distributing Hitch - Max Trailer Wt.
|
-
Wt Distributing Hitch - Max Trailer Wt.
|
|
|
N/A
Dead Weight Hitch - Max Tongue Wt.
|
150 lbs
Dead Weight Hitch - Max Tongue Wt.
|
-
Dead Weight Hitch - Max Tongue Wt.
|
|
|
N/A
Dead Weight Hitch - Max Trailer Wt.
|
1,500 lbs
Dead Weight Hitch - Max Trailer Wt.
|
-
Dead Weight Hitch - Max Trailer Wt.
|
|
|
-
Maximum Payload Capacity
|
N/A
Maximum Payload Capacity
|
-
Maximum Payload Capacity
|
|
|
-
Curb Weight - Rear
|
N/A
Curb Weight - Rear
|
-
Curb Weight - Rear
|
|
|
-
Curb Weight - Front
|
N/A
Curb Weight - Front
|
-
Curb Weight - Front
|
|
|
3,935 lbs
Base Curb Weight
|
3,496 lbs
Base Curb Weight
|
-
Base Curb Weight
|
Safety
|
Standard
Stability Control
|
Standard
Stability Control
|
-
Stability Control
|
|
|
-
Brake Assist
|
Standard
Brake Assist
|
-
Brake Assist
|
|
|
Standard
Backup Camera
|
-
Backup Camera
|
-
Backup Camera
|
Entertainment
|
Standard
Bluetooth®
|
-
Bluetooth®
|
-
Bluetooth®
|
Electrical
|
N/A
Maximum Alternator Capacity (amps)
|
110
Maximum Alternator Capacity (amps)
|
-
Maximum Alternator Capacity (amps)
|
|
|
N/A
Cold Cranking Amps @ 0° F (Primary)
|
N/A
Cold Cranking Amps @ 0° F (Primary)
|
-
Cold Cranking Amps @ 0° F (Primary)
|
Brakes
|
N/A
Drum - Rear (Yes or )
|
Not Available
Drum - Rear (Yes or )
|
-
Drum - Rear (Yes or )
|
|
|
14 in
Rear Brake Rotor Diam x Thickness
|
11.9 X 0.7 in
Rear Brake Rotor Diam x Thickness
|
-
Rear Brake Rotor Diam x Thickness
|
|
|
16 in
Front Brake Rotor Diam x Thickness
|
11.7 X 1.1 in
Front Brake Rotor Diam x Thickness
|
-
Front Brake Rotor Diam x Thickness
|
|
|
Yes
Disc - Rear (Yes or )
|
Yes
Disc - Rear (Yes or )
|
-
Disc - Rear (Yes or )
|
|
|
Yes
Disc - Front (Yes or )
|
Yes
Disc - Front (Yes or )
|
-
Disc - Front (Yes or )
|
|
|
N/A
Brake ABS System (Second Line)
|
N/A
Brake ABS System (Second Line)
|
-
Brake ABS System (Second Line)
|
|
|
4-Wheel
Brake ABS System
|
4-Wheel
Brake ABS System
|
-
Brake ABS System
|
|
|
4-Wheel Disc
Brake Type
|
Pwr
Brake Type
|
-
Brake Type
|
FAQ
Which is more reliable, the 2016 Aston Martin DB9 or the 2012 Mazda CX-7?
The 2016 Aston Martin DB9 is more reliable than the 2012 Mazda CX-7 according to Cars.com consumers, with a reliability rating of 5.0 for the 2016 DB9 versus a reliability rating of 4.7 for the 2012 CX-7.
Which is more fuel efficient, the 2016 Aston Martin DB9 or the 2012 Mazda CX-7?
The 2012 Mazda CX-7 is more fuel efficient than the 2016 Aston Martin DB9 with 22 MPG combined versus 15 MPG combined.
Which car is cheaper, the 2016 Aston Martin DB9 or the 2012 Mazda CX-7?
The 2012 Mazda CX-7 is cheaper than the 2016 Aston Martin DB9 with a $22,190 starting MSRP versus a $198,250 starting MSRP.
Compare the Aston Martin DB9
Compare the Mazda CX-7
Add car