





Mitsubishi Eclipse vs. Mitsubishi Lancer
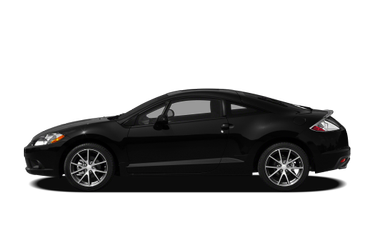
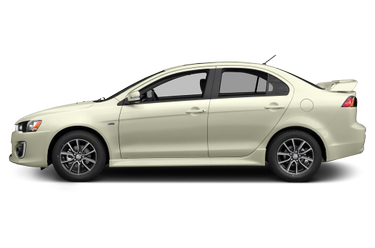

Highlights
|
$19,499
Starting MSRP
|
$17,795
Starting MSRP
|
-
Starting MSRP
|
|
|
Gas I4
Engine Type
|
Regular Unleaded I-4
Engine Type
|
-
Engine Type
|
|
|
20 City / 28 Hwy
MPG
|
24 City / 33 Hwy
MPG
|
-
MPG
|
|
|
162 hp
Horsepower
|
148 hp
Horsepower
|
-
Horsepower
|
|
|
Front Wheel Drive
Drive Type
|
Front Wheel Drive
Drive Type
|
-
Drive Type
|
|
|
4
Seating Capacity
|
5
Seating Capacity
|
-
Seating Capacity
|
|
|
5 yr / 60,000 mi
Basic Warranty
|
5 yr / 60,000 mi
Basic Warranty
|
-
Basic Warranty
|
Engine
|
Gas I4
Engine Type
|
Regular Unleaded I-4
Engine Type
|
-
Engine Type
|
|
|
2.4L/145
Displacement
|
2.0 L/122
Displacement
|
-
Displacement
|
|
|
162 @ 6000
SAE Net Horsepower @ RPM
|
148 @ 6000
SAE Net Horsepower @ RPM
|
-
SAE Net Horsepower @ RPM
|
|
|
162 @ 4000
SAE Net Torque @ RPM
|
145 @ 4200
SAE Net Torque @ RPM
|
-
SAE Net Torque @ RPM
|
|
|
M/T
5-Speed M/T Transmission Options
|
M/T
5-Speed M/T Transmission Options
|
-
Transmission Options
|
|
|
20 City / 28 Hwy
MPG
|
24 City / 33 Hwy
MPG
|
-
MPG
|
|
|
N/A
Total Cooling System Capacity
|
N/A
Total Cooling System Capacity
|
-
Total Cooling System Capacity
|
Tires & Wheels
|
P235/45R18
Front Tire Size
|
P205/60HR16
Front Tire Size
|
-
Front Tire Size
|
|
|
P235/45R18
Rear Tire Size
|
P205/60HR16
Rear Tire Size
|
-
Rear Tire Size
|
|
|
T125/70D16
Spare Tire Size
|
Compact
Spare Tire Size
|
-
Spare Tire Size
|
|
|
18 x 8.0 in
Front Wheel Size
|
16 X 6.5 in
Front Wheel Size
|
-
Front Wheel Size
|
|
|
18 x 8.0 in
Rear Wheel Size
|
16 X 6.5 in
Rear Wheel Size
|
-
Rear Wheel Size
|
|
|
16 x -TBD- in
Spare Wheel Size
|
Compact in
Spare Wheel Size
|
-
Spare Wheel Size
|
|
|
Aluminum
Front Wheel Material
|
Aluminum
Front Wheel Material
|
-
Front Wheel Material
|
|
|
Aluminum
Rear Wheel Material
|
Aluminum
Rear Wheel Material
|
-
Rear Wheel Material
|
|
|
Steel
Spare Wheel Material
|
Steel
Spare Wheel Material
|
-
Spare Wheel Material
|
Suspension
|
MacPherson Strut
Suspension Type - Front
|
Strut
Suspension Type - Front
|
-
Suspension Type - Front
|
|
|
Multi-Link
Suspension Type - Rear
|
Multi-Link
Suspension Type - Rear
|
-
Suspension Type - Rear
|
|
|
w/Stabilizer Bar
Suspension Type - Front (Cont.)
|
Strut
Suspension Type - Front (Cont.)
|
-
Suspension Type - Front (Cont.)
|
|
|
w/Stabilizer Bar
Suspension Type - Rear (Cont.)
|
Multi-Link
Suspension Type - Rear (Cont.)
|
-
Suspension Type - Rear (Cont.)
|
Steering
|
Pwr Rack & Pinion
Steering Type
|
Rack-Pinion
Steering Type
|
-
Steering Type
|
|
|
17
Steering Ratio (:1), Overall
|
N/A
Steering Ratio (:1), Overall
|
-
Steering Ratio (:1), Overall
|
|
|
3
Lock to Lock Turns (Steering)
|
N/A
Lock to Lock Turns (Steering)
|
-
Lock to Lock Turns (Steering)
|
|
|
40 ft
Turning Diameter - Curb to Curb
|
33 ft
Turning Diameter - Curb to Curb
|
-
Turning Diameter - Curb to Curb
|
|
|
N/A
Turning Diameter - Wall to Wall
|
N/A
Turning Diameter - Wall to Wall
|
-
Turning Diameter - Wall to Wall
|
Measurements
|
4
Passenger Capacity
|
5
Passenger Capacity
|
-
Passenger Capacity
|
|
|
82 ft³
Passenger Volume
|
94 ft³
Passenger Volume
|
-
Passenger Volume
|
|
|
39 in
Front Head Room
|
40 in
Front Head Room
|
-
Front Head Room
|
|
|
43 in
Front Leg Room
|
42 in
Front Leg Room
|
-
Front Leg Room
|
|
|
54 in
Front Shoulder Room
|
55 in
Front Shoulder Room
|
-
Front Shoulder Room
|
|
|
54 in
Front Hip Room
|
53 in
Front Hip Room
|
-
Front Hip Room
|
|
|
35 in
Second Head Room
|
37 in
Second Head Room
|
-
Second Head Room
|
|
|
29 in
Second Leg Room
|
36 in
Second Leg Room
|
-
Second Leg Room
|
|
|
51 in
Second Shoulder Room
|
54 in
Second Shoulder Room
|
-
Second Shoulder Room
|
|
|
44 in
Second Hip Room
|
54 in
Second Hip Room
|
-
Second Hip Room
|
|
|
101 in
Wheelbase
|
104 in
Wheelbase
|
-
Wheelbase
|
|
|
180 in
Length, Overall
|
182 in
Length, Overall
|
-
Length, Overall
|
|
|
72 in
Width, Max w/o mirrors
|
69 in
Width, Max w/o mirrors
|
-
Width, Max w/o mirrors
|
|
|
53 in
Height, Overall
|
58 in
Height, Overall
|
-
Height, Overall
|
|
|
62 in
Track Width, Front
|
60 in
Track Width, Front
|
-
Track Width, Front
|
|
|
62 in
Track Width, Rear
|
60 in
Track Width, Rear
|
-
Track Width, Rear
|
|
|
6 in
Min Ground Clearance
|
6 in
Min Ground Clearance
|
-
Min Ground Clearance
|
|
|
N/A
Liftover Height
|
N/A
Liftover Height
|
-
Liftover Height
|
|
|
16 ft³
Trunk Volume
|
12 ft³
Trunk Volume
|
-
Trunk Volume
|
Weight & Capacity
|
3,272 lbs
Base Curb Weight
|
2,888 lbs
Base Curb Weight
|
-
Base Curb Weight
|
|
|
Not Available lbs
Dead Weight Hitch - Max Trailer Wt.
|
N/A
Dead Weight Hitch - Max Trailer Wt.
|
-
Dead Weight Hitch - Max Trailer Wt.
|
|
|
Not Available lbs
Dead Weight Hitch - Max Tongue Wt.
|
N/A
Dead Weight Hitch - Max Tongue Wt.
|
-
Dead Weight Hitch - Max Tongue Wt.
|
|
|
Not Available lbs
Wt Distributing Hitch - Max Trailer Wt.
|
N/A
Wt Distributing Hitch - Max Trailer Wt.
|
-
Wt Distributing Hitch - Max Trailer Wt.
|
|
|
Not Available lbs
Wt Distributing Hitch - Max Tongue Wt.
|
N/A
Wt Distributing Hitch - Max Tongue Wt.
|
-
Wt Distributing Hitch - Max Tongue Wt.
|
|
|
18 gal
Fuel Tank Capacity, Approx
|
16 gal
Fuel Tank Capacity, Approx
|
-
Fuel Tank Capacity, Approx
|
|
|
N/A
Aux Fuel Tank Capacity, Approx
|
N/A
Aux Fuel Tank Capacity, Approx
|
-
Aux Fuel Tank Capacity, Approx
|
Safety
|
-
Backup Camera
|
Standard
Backup Camera
|
-
Backup Camera
|
|
|
Standard
Stability Control
|
Standard
Stability Control
|
-
Stability Control
|
Entertainment
|
-
Bluetooth®
|
Standard
Bluetooth®
|
-
Bluetooth®
|
Electrical
|
525
Cold Cranking Amps @ 0° F (Primary)
|
620
Cold Cranking Amps @ 0° F (Primary)
|
-
Cold Cranking Amps @ 0° F (Primary)
|
|
|
110
Maximum Alternator Capacity (amps)
|
130
Maximum Alternator Capacity (amps)
|
-
Maximum Alternator Capacity (amps)
|
Brakes
|
Pwr
Brake Type
|
4-Wheel Disc
Brake Type
|
-
Brake Type
|
|
|
4-Wheel
Brake ABS System
|
4-Wheel
Brake ABS System
|
-
Brake ABS System
|
|
|
N/A
Brake ABS System (Second Line)
|
N/A
Brake ABS System (Second Line)
|
-
Brake ABS System (Second Line)
|
|
|
Yes
Disc - Front (Yes or )
|
Yes
Disc - Front (Yes or )
|
-
Disc - Front (Yes or )
|
|
|
Yes
Disc - Rear (Yes or )
|
Yes
Disc - Rear (Yes or )
|
-
Disc - Rear (Yes or )
|
|
|
11.6 x -TBD- in
Front Brake Rotor Diam x Thickness
|
11 in
Front Brake Rotor Diam x Thickness
|
-
Front Brake Rotor Diam x Thickness
|
|
|
10.3 x -TBD- in
Rear Brake Rotor Diam x Thickness
|
10 in
Rear Brake Rotor Diam x Thickness
|
-
Rear Brake Rotor Diam x Thickness
|
|
|
Not Available
Drum - Rear (Yes or )
|
N/A
Drum - Rear (Yes or )
|
-
Drum - Rear (Yes or )
|
FAQ
Which is more reliable, the 2012 Mitsubishi Eclipse or the 2017 Mitsubishi Lancer?
The 2012 Mitsubishi Eclipse is more reliable than the 2017 Mitsubishi Lancer according to Cars.com consumers, with a reliability rating of 4.7 for the 2012 Eclipse versus a reliability rating of 4.6 for the 2017 Lancer.
Which is more fuel efficient, the 2012 Mitsubishi Eclipse or the 2017 Mitsubishi Lancer?
The 2017 Mitsubishi Lancer is more fuel efficient than the 2012 Mitsubishi Eclipse with 28 MPG combined versus 23 MPG combined.
Which car is cheaper, the 2012 Mitsubishi Eclipse or the 2017 Mitsubishi Lancer?
The 2017 Mitsubishi Lancer is cheaper than the 2012 Mitsubishi Eclipse with a $17,795 starting MSRP versus a $19,499 starting MSRP.
Similar cars for sale
-
Chrysler PT Cruiser for sale
13 Great Deals out of 115 listings starting at $1,000
-
Mazda RX-8 for sale
12 Great Deals out of 23 listings starting at $6,145
-
Mitsubishi Lancer for sale
18 Great Deals out of 77 listings
-
Scion tC for sale
25 Great Deals out of 137 listings
-
Acura RSX for sale
4 Great Deals out of 26 listings starting at $4,299
-
Mitsubishi Eclipse for sale
10 Great Deals out of 64 listings starting at $2,000
-
Mitsubishi Lancer Evolution for sale
12 Great Deals out of 75 listings starting at $7,000
Compare the Mitsubishi Eclipse
Compare the Mitsubishi Lancer
Add car